How to Add a Sub-account?
Video Guide:
Adding a sub-account means creating an independent sub-account under the master account. The sub-account and the master account are used separately, and their data does not mix. Only by logging in to the master account can you create a new sub-account permission.
Step 1: Open the Sub-account Management page
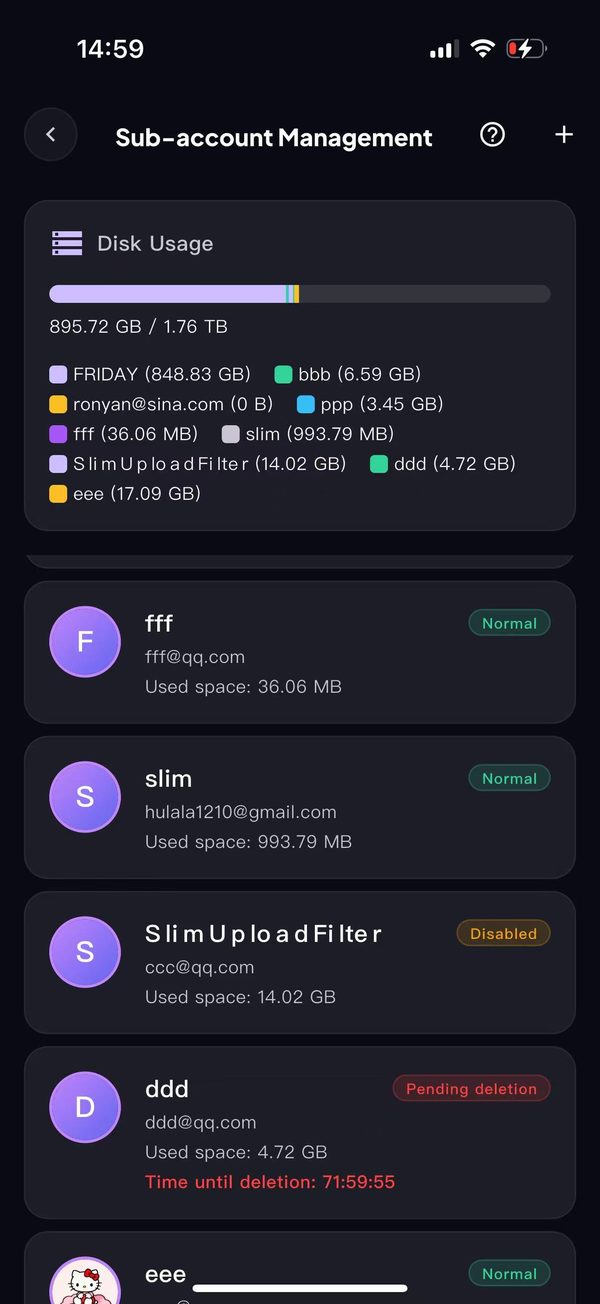
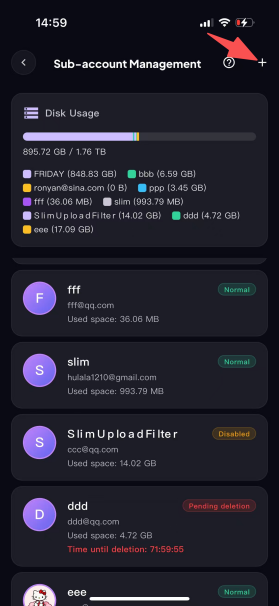
Step 2: Open the add pop-up. Tap the "+" plus button in the upper-right corner of the page, and the [Add Sub-account] form pop-up will appear.
Step 4: Fill in the account information. Email: enter the login email for the sub-account (QQ Mail / Gmail / NetEase Mail are all acceptable, and it will serve as the login account), Nickname: a custom display name for the account (such as a family member’s name or a colleague’s short name). Set a 6-digit login password; the eye icon on the right can show or hide the password.
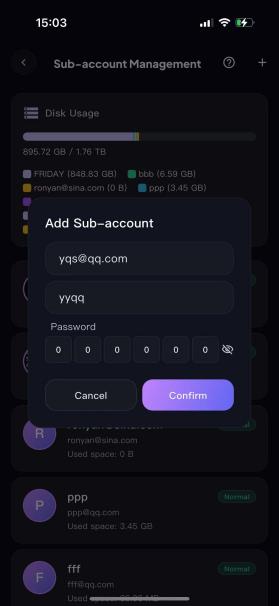
Step 5: Finish creation. After filling in all the information, tap the blue Confirm button to generate the new sub-account, and the new sub-account will be shown at the bottom; tap Cancel to discard the addition.
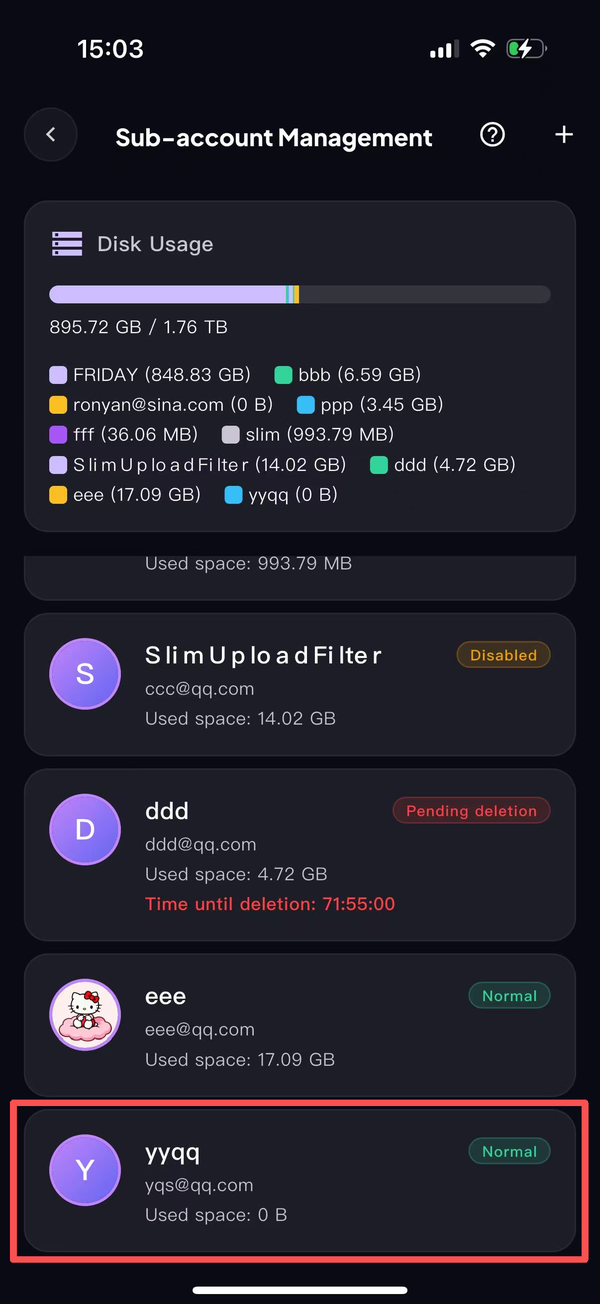
Note: 1. After creation, the new account will appear in the account list below, with its status set to Normal by default, and you can view the account’s subsequent disk usage; 2. To modify or disable the sub-account later, simply tap the corresponding account in the list to enter editing.